
1 Meter: HP double > light Decimation > HP double > light Decimation > HP double > Shadow Dominance ender (57%)
2 Meter: HP double > light Decimation > HP double > Shadow Decimation > Shadow Dominance ender (62%)
( Damage calculation notesThese damage numbers were achieved after heavy Decimation opener, followed by a counter breaker. Keeping the initial combo as small as possible helps isolate the counter breaker damage, but this is an unlikely scenario in real matches. You can expect your damage to be much higher if you counter break in the middle of a normal combo.)
Notes: With punch and kick auto-doubles triggering the same animation, and only one linker, RAAM's counter breaker combos are extremely easy to remember. Shadow Dominance does slightly more damage than spending meter on a shadow Decimation linker, so doing the 0-meter or 1-meter combo is the same muscle memory. As a side note, if you are looking to do the 2-meter combo, avoid doing the shadow ender with all 3 punches (for example, if you are using an Xbox One controller's macro button), because you will almost certainly get Kryll Shield as an input overlap. Instead, just press 2 punches; if using a controller with the default layout, I recommend pressing LP and HP, which lets you use your thumb and your index finger without difficulty.
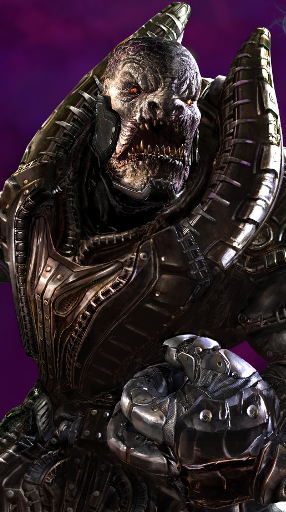
While there is already an armor mechanic in Killer Instinct that many characters make use of, RAAM has his own special mechanic called Kryll Armor which is much closer in function to Street Fighter IV's armor. When RAAM performs a move with Kryll Armor, he takes potential damage instead of real damage, and can absorb infinitely many non-shadow projectiles, and then one physical hit; once the physical hit is absorbed, the armor is gone. Grounded heavy normals do not defeat Kryll Armor like they would against regular armor; instead, all shadow moves break Kryll Armor, including shadow projectiles.
Because RAAM struggles with grounded mobility, he will need to make regular use of Kryll Armor (in particular, Kryll Shield with dash cancels) to absorb an opponent's pesky zoning projectiles and ranged normals and inch his way closer. Be aware, though, that because RAAM takes potential damage, if you get hit after absorbing a few attacks, you can expect your opponent's combo to start at level 3 or 4. It pays to absorb only in small doses and let your potential health regenerate, rather than take massive damage for one mistake a few seconds later. If you are fighting against a RAAM player using Kryll Armor, defeat it with a shadow move (use an opener to keep a combo going), or do a quick two-hit string.
You can inflict Kryll Swarm by hitting with Kryll Shield, Kryll Rush, or Emergence. Many of these attacks do 0 damage up front, so applying the poison is the main benefit, and RAAM will have to make sure he doesn't immediately get hit or combo broken in order to reap the rewards. In addition to simply blocking and biding your time while the poison does damage, you can also enter combos and watch the opponent's life tick away even more rapidly. A particularly strong way to help the poison do damage is to land a Dominance command grab, as its long animation will make sure the poison has time to work. In general, though, it is unlikely you will get the full 14% with every Kryll Swarm application. If you can keep the opponent preoccupied for around half that time on average, you'll be doing well.
RAAM's focus on grappling is very apparent when looking at how short his list of openers is. Decimation, a grounded move where he lunges forward with his knife, is RAAM's only traditional combo opener. He is the only character in KI to have just a single opener, and because of this, it really pays to know the ins and outs of this move, as you will be using it often.
Light Decimation is the fastest version of the move, and it is the only regular version that combos off light and medium normals. If you are looking to buffer a special move from any normal less than a heavy, with the intention of starting a combo, light Decimation is your only choice. Unfortunately, this move is -9 on block, so it can be punished easily by opponents who can see the difference between the versions. Despite this being RAAM's most reliably combo starter, light Decimation is not a pressure tool, so it must be used sparingly; the most common use is when you need to use a light or medium normal to punish an opponent's mistake, as no other option will do. Unfortunately for RAAM, no manuals are possible after light Decimation, so combos will need to transition directly to auto-doubles or linkers.
Medium Decimation is visibly slower than light, and it will only combo after heavy normals, such as RAAM's excellent standing HP. It is safer on block at -3, meaning no characters can punish it with normals, and due to the speed of RAAM's Dominance command grab (see the Specials to Watch section below), he can interrupt a lot of attempts to challenge after this move. But in many cases, RAAM's turn is over if this is blocked. Heavy Decimation is the slowest yet, and doesn't combo after any often-used normal (only the rather slow stagger normal standing HK). However, it is the safest on block at -1, which is stronger than it sounds when coupled with the fast Dominance grab.
Despite it not leading to guaranteed combos, canceling normals into heavy Decimation is actually quite strong and often recommended, as it generates natural gaps that can catch jumpers who are scared of RAAM's command grabs, and on block, RAAM is in business for a mixup. Heavy Decimation also has very far horizontal range, so it is a quite viable footsies tool. Shadow Decimation has no particularly special properties, aside from strong opening damage. It has pretty short horizontal range and isn't invincible to any type of attack, so its uses outside of combo starters are limited. If you block a DP, cancel standing HP into shadow Decimation as your opener.
RAAM can also cancel Decimation into Kryll Shield for 1/2 of one shadow meter (see below for more on Kryll Shield). This is most useful when trying to use light Decimation for close or mid-range mixups; for example, you may want to use RAAM's strong crouching MK as a good low poke, but you must use light Decimation as a followup if you want a combo. If your opponent blocks your crouching MK canceled into light Decimation, rather than accepting your punishment, simply spend half of one shadow meter to cancel into Kryll Shield to make yourself safe.
Kryll Shield is another important tool for RAAM, as it is his main way to get around zoning and mid-range pokes that would otherwise keep him locked in place. Press and hold all three punches to charge up a stance that has Kryll Armor. Release the punch buttons to get RAAM to lean forward with his fists extended; if this attack counter-hits the opponent, or you let it wind up all the way to max and release an unblockable hit, the opponent will get staggered and you can land a combo (including a raw, unbreakable heavy Dominance grab if that's your jam). For all intents and purposes, Kryll Shield is virtually identical to Street Fighter IV's Focus Attack. On hit, whether you cause a stagger or whether you simply hit an opponent in a non-counter hit state and knock them down, you will deal 0 damage and inflict the Kryll Swarm poison effect.
If Kryll Shield is released and blocked by your opponent, RAAM leaves himself at a rather disgusting +8 on block, usually in range for light Dominance but certainly in range for beefy normals like standing HP, which will hit any opponent who squirms in his chair. This incredibly strong frame advantage is a central part of RAAM play and is especially strong in the corner, where your opponent has nowhere to go and RAAM is much more likely to be in grab range. If RAAM makes you block Kryll Shield and then he cancels into a forward dash, he is at -2 frame disadvantage; not punishable and still a threat to land Dominance, but in practice you will only cancel into dash if you are looking to move RAAM forward into a better range. The extreme block advantage without dash canceling is too delicious otherwise.
Kryll Shield is not without drawbacks, however. For every attack you absorb, you will accrue potential damage, meaning absorbing multiple hits in quick succession is a fast way to give your opponent an easy level 4 combo on you the next time he hits you. Secondly, if RAAM cancels Kryll Shield into a dash, the armor will not be active while dashing, meaning using it to move around too much is likely to get you tagged by a stray hit, and smart opponents might let you hang yourself trying to dash in too often. If you manage to apply a Kryll Swarm poison debuff, you might not always want to press your advantage, especially if you have lots of potential life on the table from multiple absorbs. Instead, let the poison do its job while your white life heals.
As with the openers, RAAM only has one linker and one shadow linker for use in his combos, making him a little easier to combo break than other characters. He will simply lunge forward 1, 2, or 3 times with his knife for the light, medium, and heavy version of this linker. The only trick to breaking RAAM is understanding when he is doing a linker, and when one of the knife swings is part of one of his auto-doubles. The medium auto-double is particularly tricky, since the first hit looks rather similar to one of the knife swings from Decimation. RAAM players themselves might even get lost a little bit in the cadence of the combo due to this, so it pays to take an especially close look at RAAM's medium auto-double and understand its animation.
Without a battery ender to fuel his amazing shadow Dominance grab, midscreen RAAM must decide between pure damage with the Dominance ender, or applying a Kryll Swarm poison effect with either Emergence or Kryll Rush. Emergence causes a hard knockdown in addition to applying the Kryll Swarm effect, so RAAM can choose his standard knockdown Deadly Stomp mixups, while Kryll Rush is an advantage ender, leaving the opponent standing and giving RAAM +4 frame advantage. Emergence might be the stronger of the two options, since RAAM can pick whether to perform a meaty, mix up with Deadly Stomps, or try for a crossup, and Emergence does more raw damage to boot. In either case, RAAM will score more damage over time as the Kryll Swarm adds up, effectively powering up the damage of choosing these enders beyond the percent displayed on the screen.
Much of the time, though, RAAM will choose the Dominance ender, especially if there is a lot of potential damage on the opponent. Its long duration means that Kryll Swarm or RAAM's instinct mode will be given maximum time to operate. If RAAM uses shadow Dominance as an ender, he can also apply Deadly Stomp mixups as an extra bonus. In the corner, RAAM can use Decimation as a wall splat ender and get the normal wall splat mixups, as well as landing heavy Dominance for guaranteed, unbreakable damage if he prefers.
Because this instinct does nothing more than simply add potential damage, it is mostly useless to RAAM unless he can find a way to cash out all the white life. Perhaps the best time to activate instinct is if your opponent has already locked out during a combo. Activate instinct as soon as you see the lockout, add a couple heavy auto-doubles to your combo, then cash out with shadow Dominance, whose long animation will allow extra white life to stack up. You can expect damage north of 75% if you use instinct in this way. If, however, you activate instinct when not in a combo, you need to open your opponent up in a way that leads to a combo. Smart opponents will hold down-back and block out RAAM's pressure, since he has no grounded overheads, and they will accept some throw damage since they cannot lead to cashouts. If this is the case for you, grab your opponent with light Dominance and then try to open him up with a tricky cross-up attack (see Specials to Watch below); this is probably your best chance to catch good defenders with a grounded combo opener.
To offset RAAM's floaty jump, he has a bevy of beefy jump normals as well. Jumping HK is among the longest range jumping attacks in the game, useful for making contact with an opponent much farther away than they can easily anti-air you. Jumping HP is a "splash" attack, as is grappler tradition. It can be used as a scary crossup attack from a wide variety of ranges, and its mammoth hitbox means it will virtually never whiff if you are anywhere near your opponent. For air-to-airs, stick with jumping MP, as it's decently fast and has a good horizontal hitbox for challenging air opponents.
Kryll Rush is a "running bear grab"-style move which sees RAAM stampede across the ground. While he is charging, he has Kryll Armor, so he can possibly absorb some attacks. If he touches you, he does some small damage and poisons you with Kryll Swarm while leaving you standing in front of RAAM, who will have +4 frame advantage. This attack, like all grounded throws, can't hit opponents who are jumping, but it is useful in tick situations as a surprise advance when canceling a normal attack. RAAM can also cancel Kryll Rush into Kryll Shield at any point for one shadow meter, which stops his forward momentum dead in its tracks as he charges up the Kryll Shield attack. Use this to fake out or abandon a poor Kryll Rush attempt, and maybe absorb a jumping attack from an opponent who has tried to evade your Kryll Rush. Like many attacks of this nature, Kryll Rush is best used sparingly and by surprise, since it is a high risk attack. Shadow Kryll Rush is projectile invincible, so you can use it to blow through predictable close and mid-range projectiles, but it's a tad too slow to be used from full screen.
RAAM's most important special move is Dominance, a fast and far ranging command grab that is high damage and leads to further offense. Being a grappler, it is the core of RAAM's gameplay and fundamentally important to earning damage with this character. All non-metered versions have the same startup, hitting on the 4th frame, which is 1 frame faster than the fastest normal. The light version has the most range and is crucial for RAAM's approach; he can routinely grab opponents who are seemingly too far away to be punished. The heavy version does the most damage and leaves RAAM very close, which can be useful for setting up some meaty attacks. After any Dominance grab, you can always use Deadly Stomps to either flip them out or cause another knockdown, though after light Dominance you will have to dash or jump forward to be in range first.
RAAM's offense doesn't end when you land Dominance, though. In addition to playing the Deadly Stomps game any time you choose, RAAM has some tricky crossup mixups that really augment the threat of his offense after his scariest offensive tool. In particular, light and shadow Dominance, arguably the two most important versions of the move, give RAAM midscreen set play options; these are particularly useful for opening up opponents who have a lot of white life on them after instinct activation. Here are some setups to get you started -- see if you can find even trickier variations of these in training mode! For each item in the list, small indistinguishable variations on timing and spacing on your setup will cause the attacks to either cross up or stay in the front. These setups all work on Jago, at the very least, and make reversal DPs difficult or impossible. Experiment with different characters.
- After light Dominance: perform Deception (
 +MK), whiff crouching LP, then jump forward either immediately or after a slight delay. Press jumping LK, jumping MK, or jumping HP.
 - After shadow Dominance: walk forward a step, wait about half a second, then jump forward. Press jumping LK, jumping MK, or jumping HP. This setup requires some practice to perfect, but because there are no whiffed moves, it is nearly impossible to tell when the setup will be crossup or not.
- After heavy Dominance: whiff crouching HP. Pressing standing MK or heavy Decimation will be a perfect meaty attack and lead to a manual of any strength on hit. It is difficult to attack with an ambiguous crossup from this range.
- After forward throw: whiff medium Decimation, then hold up forward. Press jumping LK or HP for a crossup attack. To land in front, delay the medium Decimation ever so slightly.
Most RAAM players won't be wondering how to terrify an opponent who is close, since his toolkit is built exactly for this purpose. Most of this page has laid out a gameplan for exactly that; mix up combinations of his devastating normals, sometimes canceled into high strengths of Decimation for frame traps or combos but not always, followed by surprise uses of Dominance when your opponent is not ready for the speed or the range. Be ready for anti-airs, as opponents are likely to pre-emptively jump in fear of Dominance, and try to chase jump-back opponents with either the occasional Kryll Rush or jumping normal. When you've got your opponent knocked down, either wait for Kryll Swarm to slowly do damage, or mix them up with Deadly Stomps or planned set play. That's RAAM in a nutshell.
Instead, players will be wondering how to overcome RAAM's troublesome matchups, where opponents are able to keep RAAM at a distance for long periods of time. Long time fighting game players will know this struggle as the "life of a grappler", who has to pay the penalty for his strong up-close game with a weak and often frustrating ranged game. RAAM's main options here are to walk forward and block, slowly inching yourself into range, accepting that you will take some stray hits here and there. He can also use Kryll Shield to absorb and then dash forward through attacks, though be wary that potential damage will add up fast on RAAM, so back this technique up with some moments of patience to avoid taking a punishing combo the next time you get hit. You can also cover fairly large portions of the screen quickly with Kryll Rush, and then cancel into Kryll Shield near the end, and perhaps earn ground that way, though this technique costs shadow meter so it is not always available or desirable. Use shadow Kryll Rush to get through projectiles when you are mid-screen or closer as a final push, but this needs to be done quite early to be successful. Jumping forward and using jumping HK, a normal with outstanding range, can also lead to success. In practice, you will need some combination of these, plus some patience, to close the gap. Just know that the reward will be worth it when you get there.